This is the third and final installment / 30 day block of the Agerbeck Method, which follows my key insights from Brandy’s visual thinking course. This will go through Shape, Image and Flow.

The first 30 days can be found HERE (canvas to text). The second set of thirty days can be found HERE (colour to scale).
61 – Seeking Shape – Found vs Fixed
An interesting lesson. My reflections on this are:
To some extent having a larger anchor in the centre creates some scaffolding for structure. I say this in the sense that it allows for radial topics or “clockwise” type structure.
Being able to watch / read something twice may allow for the creation of appropriate structures. i.e. knowing that there are 3 topics with 4 key points each.
In terms of being comfortable, a lot of my facilitation work uses predesigned templates, such as “Grove” type murals or “Canvases”. One of my reasons for taking this course was to break out of the daily work and get more scribey.
62 – The gift of the blank page
I wonder if a blank page is a blank page. I say this becuase if we are accustomed to use a page in certain ways, that becomes unconscious choice. Looking through a pile of sketchnotes, many started as a blank page, but the shape/ structure seems similar on many. They are not that varied as say Mikayla Lewis’ Sketchnote structures diagram (https://makaylalewis.co.uk/2016/06/29/19-sketchnote-styles-cheat-sheet/), but many follow a similar flow.
I am wondering if I try and do a visual and force myself to use a different shape on a second go around, if that would help. Not that I have time to do that though.
63 – Grasp
Reflection on the lesson > I like the idea of GRASP roles:
Investigator – Using the different roles / perspectives is a great idea – Am I creating a visual for me / others. What do they want to see? What would help them in this summary?
Iterator – Definately a missing role in my visual practice. I tend to do a sketchnote / flipchart without really thinking about structure, colours etc and just go for it. I never try again :-(
Integrator – Always work in progress and this is something I really enjoy.
Activator – A role I love. I am regularly asking myself, great ideas… how can I use this? Who else could use this? One of my reasons for attempting to blog is precisely because of the Activitor.
64 – Whole composition – Stay Spatial
Reflections – The following really resonated with me:
- Tip 2 – Columns is a natural style in my work that I recognise. This can be seen in some of my notes for the course I teach at university: http://andiroberts.com/wp-content/uploads/2016/10/B629K_Chapters_6_to_9.pdf
- Tip 3 – I never use pencil and it has been in my case for a year – I must resucitate it.
- Tips 5 & 7- Like the idea of squint and get distance – will try them.
- Tip 9 – Macro cues in terms of shape / layout / composition ahead of time.
- Tip 10 – Doing more anchoring
Some great tips here. I have purchased some large paper this week and hope to start playing larger in the next few weeks, so this section will come in really handy!
My additional tip would be to leave the visual for a while and then come back to it and view from different distances.
65 – Meaningful choices
I like the idea of meaningful choices – this is, in essence, the checklist that I mentioned a few lessons back.
The idea I really took from this lesson is doing a draft visual,in terms of major composition ideas / items. Possibly in pencil ;-)
Have a great 2019 – it’s getting closer!
66 – Tie it together
I really liked the overall flow of this lesson and how the chart built up. The anchor / everyman makes sense here. I am wondering if there are other universal / common anchors i.e. everybrain, everyorganisation and so on.
67 – Depth – Line versus shape
I really like the hatching. I notice they are pretty tight together. Some great tips here in this lesson that help the difference visual elements pop out. I struggle with cross-hatching, particularly consistency of space. Must get practicing!
68 – Fill’s 4 functions
I liked the lesson. If I reflect on my own work I tend to use:
1) Simple grey drop shadows
2) Simple contour shapes, like the left hand of the three “give a shape dimensionality”
I think I need to go and explore examples of the four in use in visual noting / graphic facilitation.
69 – 2 Pens & 10 choices
I really liked how this lesson worked through the visual and it was explained in the process. Most of the time we see the finished product, but not the thinking process that goes with it.
Muppet theory – Every day there is something new to learn. Off to find the research.
Brandy’s almost finished version of the image developed during the course of this class:

70 – Review of shape
Key take always for me were:
- Be comfortable with not knowing and simply accept the value of emergence as the a visual enfolds.
- Consider my GRASP role preferences and be more aware of when a switch / shift would be appropriate.
- Do more iteration – use time just trying stuff out, rather than try and get the perfect attempt the first time around.
- Be aware of falling into the natural traps of lines and/or columns.
- Think more about line weight and how they can be used to add depth.
- Consider more options for adding depth (when appropriate).
- Look to flow visuals more – get organic!

71 – Image Iceberg – Meet the model
Key take aways: The key messages really resonated:
- The focus on process – iterate if product is important.
- Enjoy the process of practice – No pressure
- Practice makes progress – Be OK with not being “so” great – keep going!
The idea of smallest number of strokes in images was interesting – I had not really thought of this.
Reviewing my work – I definitely suffer from iconitus.
72 – Untangling imagery
I had not really considered the image types as separate, discrete things. Previously I just saw them as being levels of difficulty. I love the continuum idea-representational through to abstract.
I imagine that this is the longest lesson of the whole course – great value per minute!
Speed, Style (Congruent style and detail) and content of image use are three critical considerations.
I had to include this video of one of my favourite groups. The lyrics are pretty good (OMD – Isotype):
73 – Metaphor
An in interesting lesson. Metaphor certainly has played a strong part in my early career. Particularly in leadership development, which used outdoor activities quite heavily and often became the centre of the review / learning process. I see some really clear visual metaphors in the work of The Grove: Bridge to 201X i.e. 
Or Movie Vision: 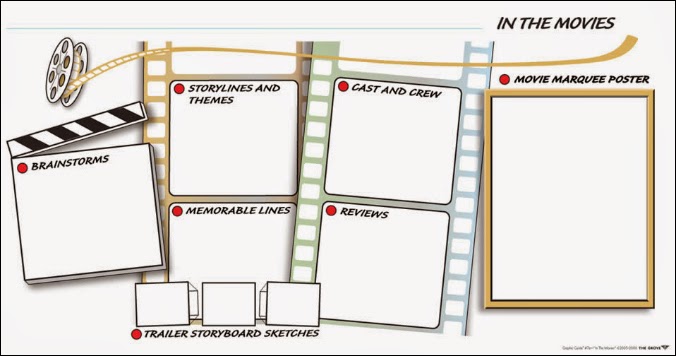
The sections on trees and journeys really resonated with me, in terms of being common and possibly not being culturally appropriate. I guess if using trees, we should look to see what is appropriate i..e. certain parts of Africa may connect with a Baobab tree, but this is not found all over the continent.
Could you provide the link to the Kommunikationslotsen reference – I see no links in the cross reference section?
74 – Visual Vocabulary – What you need
An interesting class again today. I must admit, I am a founder member of “iconitus anonymous”. After working for years with mind maps and visual templates, the first visual books I bought were the Bikablo series (1,2 and Emotions). This has definately drawn me down that path. I am starting to see the light slowly. A while back, whilst doing my MSc on Systems Thinking in Practice, we looked at Soft Systems Methodology as a tool for transformation. That uses a technique called “rich pictures”, generally made up of stick people and simple icons. Some Research has been done around what icons are most common:

75 – How to get it
I have quite a few of the resources from this class. All really great. As you mention, practicing is the crucial thing ( I need to do more). I have never seen the flash cards thing on a ring. A great idea. A couple of interesting resources I like are:
Studio Limon from the Netherlands – They have done a great series of “ways to draw” https://www.instagram.com/studiolimonillustrations and https://www.instagram.com/explore/tags/waystodraw/?hl=en
Also The Noun project, which is a search engine for icons: https://thenounproject.com
76 – Hold it lighly
Some great pointers in the class. Definately seeing this iconitus as a challenge. Having said that, there are so many options available from the breadth of the course. As I was watching this, I was thinking of Kelvy Bird’s work and those of generative scribing generally. They are very light on icons and yet convey very deep meaning (examples: https://www.pinterest.co.uk/andirobertsuk/generative-scribing-samples/)
77 – Character – 6 Moods
Really simple. I particularly loved the combination of head and body, particularly the small touches like arms folded or shaking fist.
78 – Bodies for your buddy
An interesting class. I was always wondering why Bikablo do not use faces. I thought it was for speed of drawing, but now I am wondering if there are other reasons?
Whilst doing a search of Ed Emberly, i found this page: http://edemberleydrawingpages.blogspot.com

79 – Your Everyman
This is definiately a tricky practice builder. Wondering how long it will take to find a “character” that works. Most of vy visuals have been “faceless” Bikablo zombies, so this is a signficant switch. I was wondering Brandy, did you arrive at your Everyman fairly quickly? Did you have sources of inspiration?
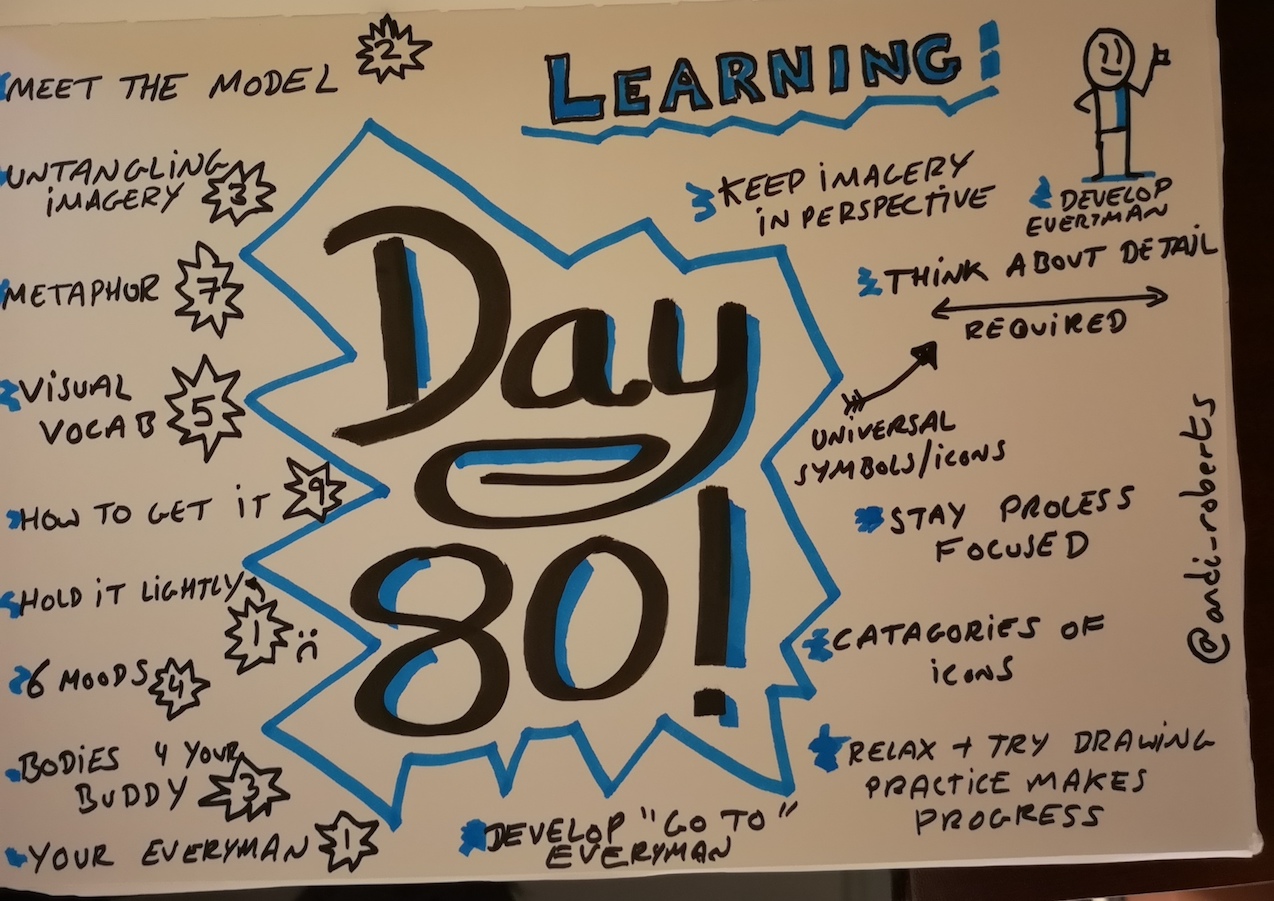
80 – Image – Wrap up
Key learning points for myself:
- Keep imagery in perspective
- Think about how much details is really required
- Aim to build up universal symbols / icons
- Stay process focused rather than icon focused
- Consider catagories of icons
- Relax and just try (practice makes progress)
- Work on a personal Everyman
81 – Movement – Direction
Key take aways for me for this lesson are:
- Sequence versus movement and the role of containers to create visual clarity.
- Slime monster connectors could be awesome.
- Use of cross hatch lines for depth on whiteboards.
- Consistent ways of working, connector stems in this instance.
- Not fretting around not getting the sequence prior to ending the initial visual ( and the role of The Trio here).
- Spectrum of colour to show movement and the use of the colour wheel / order.
Wondering if buying some empty ‘big one” markers and filling with dry erase ink would help create thicker lines. I saw someone use a “far one” with grey ink to create cool text boxes for white boards a while back.
Also wondering is colour coding could be levels of tone/tint of a specific colour.
I am not seeing the pdf :-( great lesson.
82 – Disruption
Key learnings from this lesson are:
Pattern disruption as a technique in general: `separate “break” containers, with contrasting colour, especially red.
I particularly like the star / fallout in the number sequence, as a way of disrupting the visual flow and as a colour novice using the complementary colour to create disruption / contrast.
Looking at past drawings, there is no disruption happening. Need to look at ways of logically building this concept in.
83 – Arrows
Loving the sound effects in this lesson. I also do them all of the time. Much to the chagrin of my family.
My associations with the examples were:
- Growth
- Decreasing / reduction
- Agile, scrum, iterations
- Parallel processes, aligned goals (yikes)
- Conflict, clash, disagreement
My associations with the arrow activity:
- Stronger process or more important one.
- Recycle, continuous improvement, iteration
- Opportunities, new routes
- Coming together, alignment, agreement, one strategy / direction
- Focus, pooled resources, attack, convergence
- Expansion, divergence, heading off
- Change, pivot, re-adjust
- Broken process, disruption, change, tension in vision
- Achieving a milestone, going through hoop, project gate achieved
- Creativity, non linear process, change
- Bouncing off, not convening, deflection, agile versus large process
- Recycle, cycle, circular
- In the box, supply chain distribution, capture ideas / resources, be constrained
- Out of the box, escape, break constraints
- Dominate, overtake, push out old, new agile versus slow solid
- Divergent opinions / ideas
- Divergent ideas with more agreement
- Chaos, random, lack of clarity
- Engagement, shifts in energy
- Multiple processes, aligned processes, agreed direction, varying velocity of teams / processes
- U Turn, change of plan / strategy/ action
- Choices, reality versus planned
- Process, order, alignment
- Indirect route / action / path
- Intertwined, working together
I did a hunt… I do play a bit with arrows, but this lesson gives more range. Great!
84 Part 1 – Your visual voice – your hand
The things that resonated with me:Find your own style / camp / visual voice really resonated with me. Particularly being heavily immersed in “bikablo” style up to now. Certainly feeling the need to just experiment.
“Practice makes progress” – still need to throw way more hours in.
“Process over product” – I am definitely reflecting more and being more discerning around my own work.
84 Part 2 – Brandy’s hand
Things I took away from this lesson are:
It was just great to hear you work through and share your thinking.
I like the idea of keeping ICO incomplete until later in the drawing. I find that quite hard to do.
Consistency and integration as facets to consider – I struggle with these, so a good reminder.
I like the negative space style, both cross hatch and lettering. How you sketched out the outline of “BRANDY’s HAND” was pretty amazing. Very effortless, which I guess,5 shows practice.
>> I am happy to do some feedback / discussion on style / hand if that helps others. Ping me in FB, Twitter or LinkedIN.

Day 85 – Influences & fluency
My influences…
Own visual cultural influences – bikablo, grove templates, systems dynamics diagrams. I like other things visually, but they do not influence my work.
Your teachers – not sure really, but influencers are clearly yourself, lettering by Heather Martinez and Vanessa Rendle. Kelvy Bird’s work is also inspiring.
Materials – I tend not to have too much experience here. Neuland markers have been in my pack for a long time. Also for large work, I use wax blocks from Sock Mar and of course, sticky notes.
Practice – Not sure what really resonates yet, I still think it is too soon.
Creating my own 100days when I started, which was around building competence in bikablo has certainly influenced me, perhaps too much.
Experience – still working through this.
Visual vocabulary – very much influenced by bikablo. My lettering is poor. I have signed up for a workshop in the new year to tackle this, but need to practice this way more. I have not collected images, nor before this course, thought about collecting choices.
It would be great to have a .pdf of this visual.
Day 86 – Using your visual voice
Thoughts on this class:
I must admit, I am seeing less people commenting / mentioning that doodling is not great or a distraction. One of the good things is that there is now a lot more research on the value of visuals now. In my training courses, I am often not using PowerPoint and actually providing materials to doodle or mind map. Interesting for business leaders, mind maps seem a safe way of getting them to start using visuals.
I am certainly seeing an appreciation for my visuals in meetings, courses and coaches. I am regularly getting asked about how I learnt (to which I say, I am very novice) and so I am now sharing resources. I have created a short link to tools and ideas around visual facilitation: bit.ly/viz_hub (your books and course are front and centre) and I have had people ask about this course and so that is why I started blogging about it. By blogging, I am also pushing myself through the course.
Personally I see great opportunities to use visual work to support a series of causes. The Grove have set up The Glen to support social and environmental causes: https://glen.grove.com
Thanks for even more food for thought!
Day 87 – Keep your flow – practice makes progress, reprise
I purposefully chose not to make notes whilst listening to this session. What bounced in to my brain, was slow down and enjoy the practice.
I must admit nothing is feeling like second nature at the moment. I think what I need to do now is just get more doing done and then loop back and complete the course again (don’t worry I won’t post on every day again!). I do feel that I am thinking differently and this is having some impact. I am certainty thinking more now before putting marker to paper.
Day 88 – Resource-fest!
I really like the idea of being resourceful and using our own intuition and ideas.
Last week wee, as part of my university studies on design and innovation, we did a trip to the London Design Museum and I went with my visual radar on. There were some great pieces on visuals: signage, mapping, type and a pile more.
Day 89 – Perpetual pep talk from Brandy
I recognise that my inner critic has certainly reduced and has turned into an “inner questioner” i.e. how else could you do that? what would make it more awesome? What did you learn?
Memory muscle is certainly shifting, as is confidence.
So now I am really curious, what is the “new” book on and when can we expect the full online course to support it? Only joking ;-) I need to repeat this a few times. Always enjoy your book writing process!
Day 90 – Flow wrap up
Thanks Brandy for such an awesome book and set of lessons. LARGE applause to you for taking the time to share your ideas and encourage us all.
Key take away for me is around being confident with flow and at the same time, the fact that there, as always, so many options. I absolutely loved the range of arrows!
My final end of module review….

Thanks for reading. If you have any feedback about my work or any questions about the course, please post them below!
What are your thoughts on this....